Wise AI VitalCheck Zoom App Guide
Documentation for adding, using, and removing the Wise AI VitalCheck integration with Zoom for telehealth visits.
Adding VitalsCheck
Follow these steps to install and enable the app in Zoom. If something fails, see Troubleshooting (FAQ).
Open Apps in Zoom
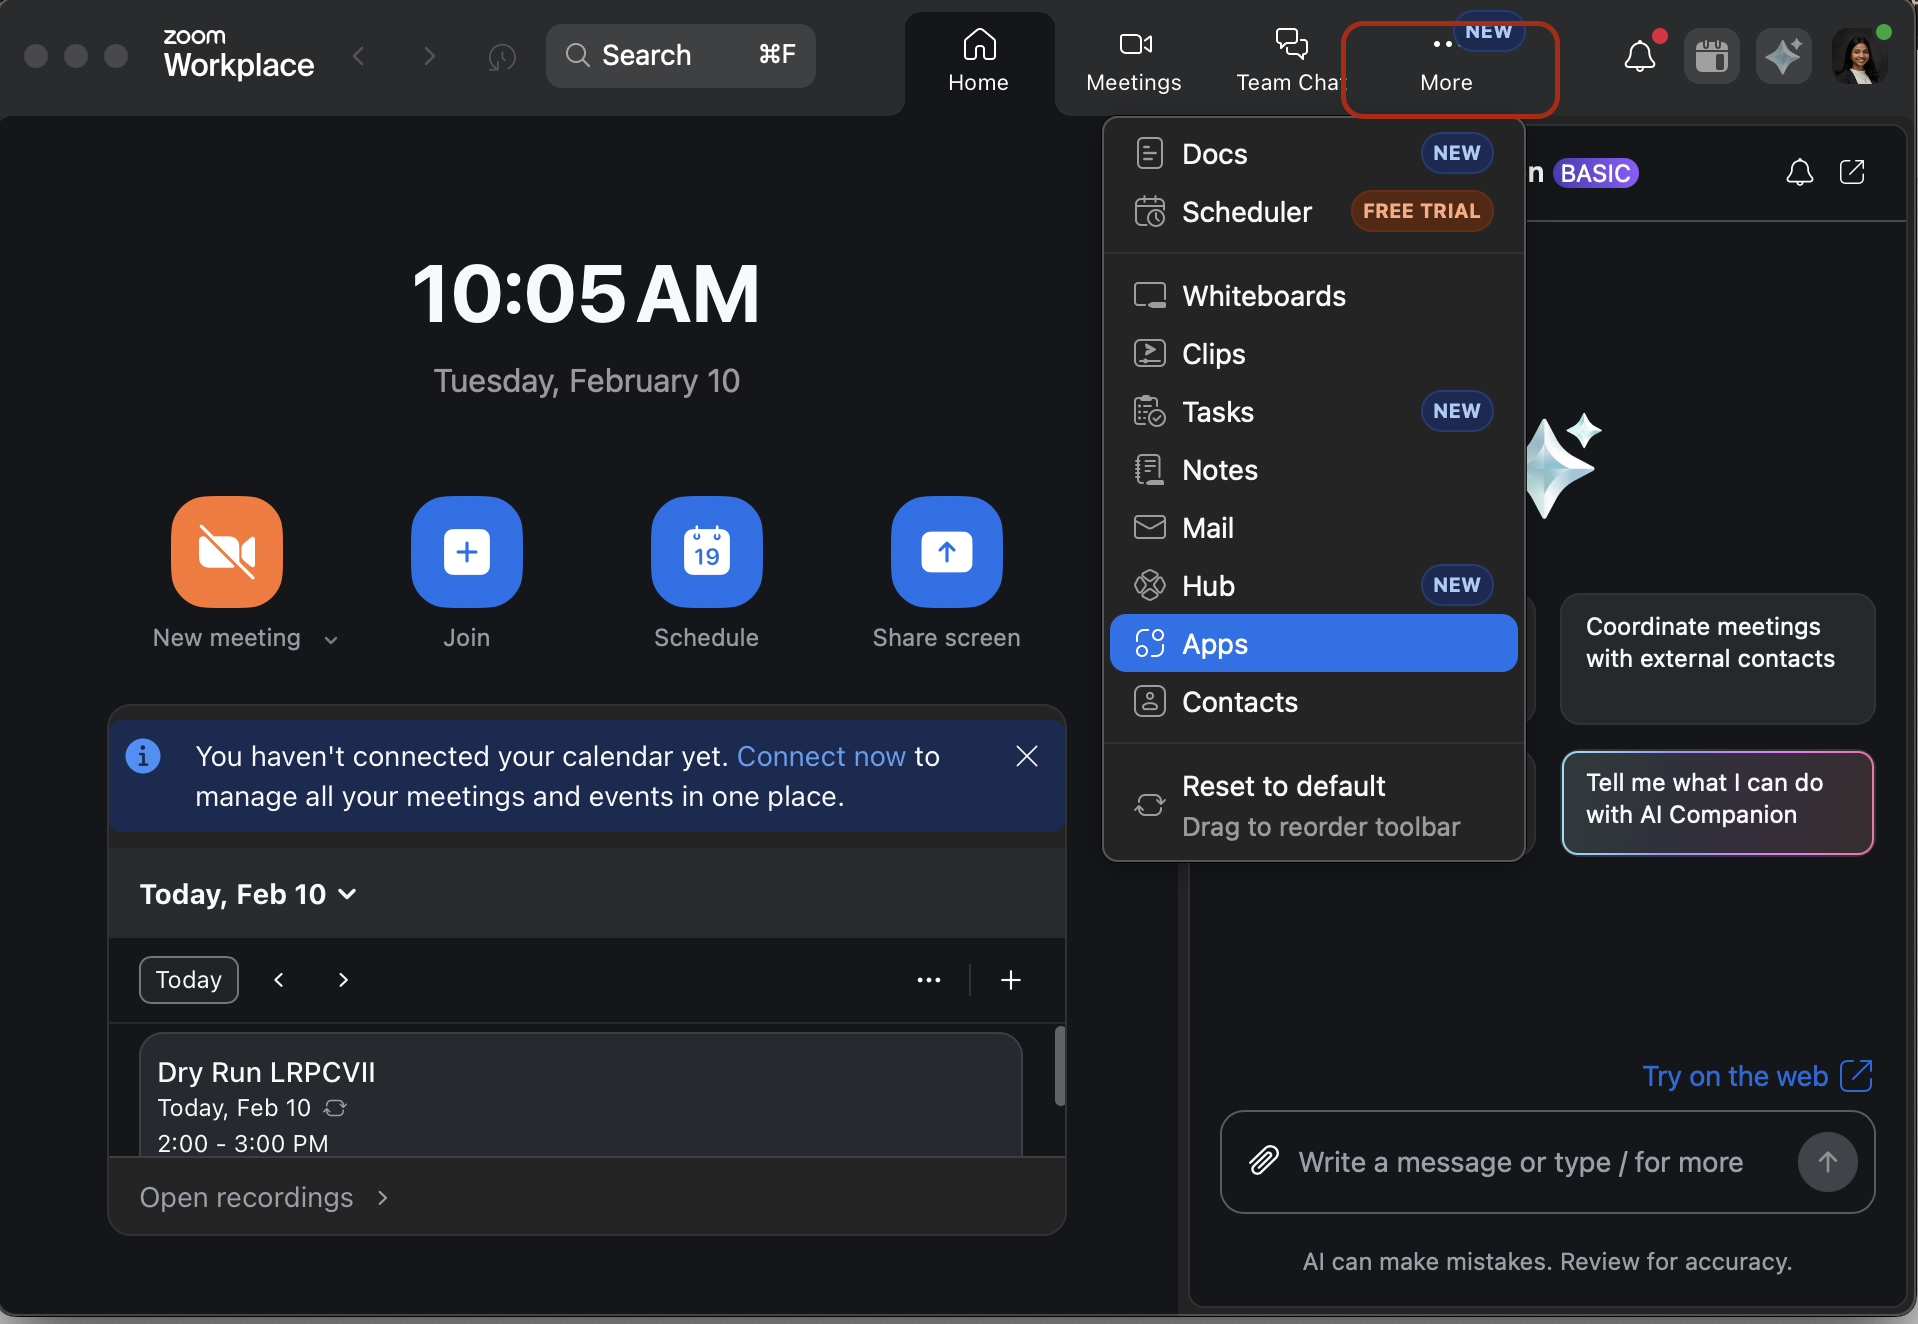
Open your Zoom application and click on "More" > "Apps" on the home page.
Add VitalsCheck from the Zoom Marketplace (if needed)
If VitalsCheck is not already listed under "My apps", open the Zoom App Marketplace, search for "Wise AI VitalCheck", click Add, and approve the requested permissions for your account.
Enable Auto-Open
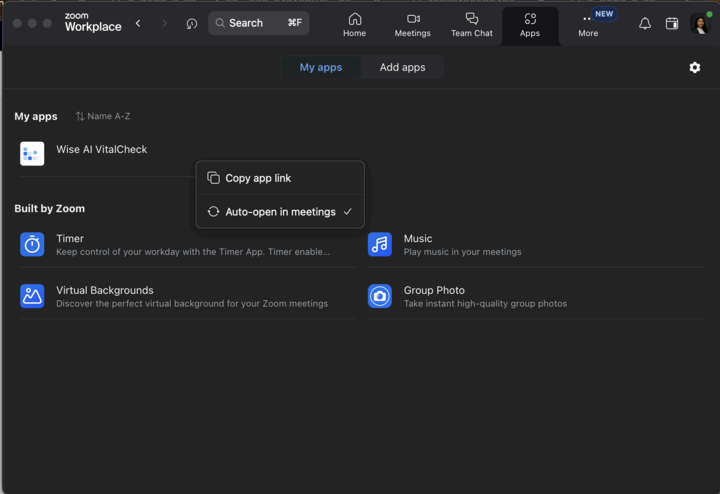
Click on the 3 dots next to the app and select Auto-open in meetings so it is ready whenever you start a call.
Using VitalsCheck
Each feature below lists when to use it and what must be true before you start.
Start a meeting and open the app
Use case
Open VitalsCheck inside a live Zoom visit so you can run a vital sign scan on a patient.
Prerequisites
- •You are the meeting host.
- •VitalsCheck is added to your Zoom account (see Adding VitalsCheck above).
- •The patient has joined the meeting.
Start any Zoom meeting where you are the host. To open VitalsCheck during the call, click Apps in the meeting toolbar (same area as Share).
Prepare the patient
Use case
Set expectations and lighting so the 60-second camera-based scan can read pulse and breathing reliably.
Prerequisites
- •Patient is in the meeting with camera available.
- •You have introduced VitalsCheck and how the scan works.
- • Face centered in the camera
- • Good lighting
- • Neck and shoulders clearly visible
- • Patient resting and breathing normally
- • Patient camera on for the full 60-second scan
Select the patient
Use case
Tell the app which participant's video stream to use for vitals (one patient per scan).
Prerequisites
- •Patient appears in the participant list in Zoom.
- •You know which attendee is the patient (hosts are not selectable as the patient).
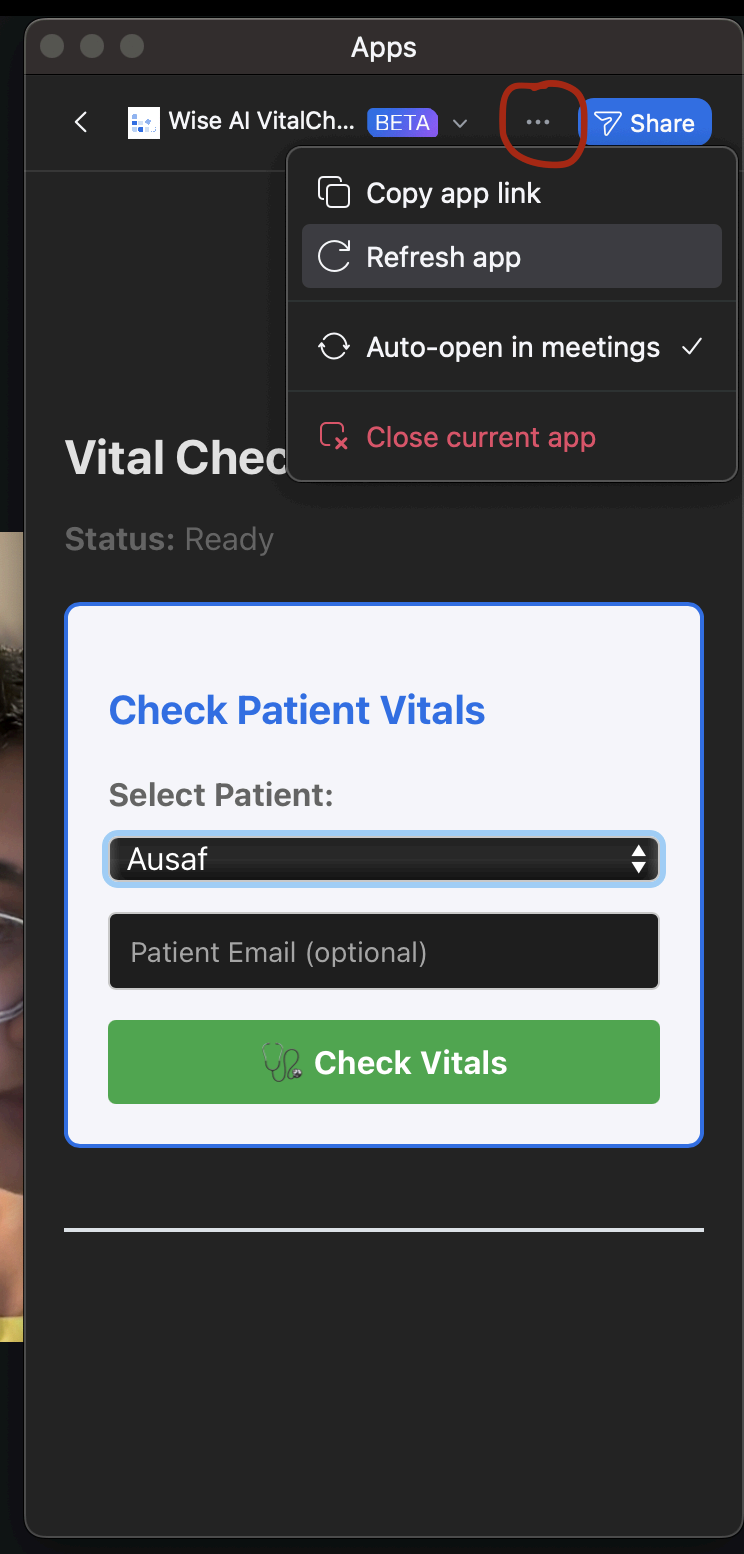
In the app, use the dropdown to select the patient. If their name is missing, open the 3-dot menu in the top-right of the VitalsCheck panel and choose Refresh app.
Obtain consent and run the 60-second scan
Use case
Measure heart rate and respiratory rate from the patient's live video for about 60 seconds, with consent documented in meeting chat.
Prerequisites
- •Patient selected in the dropdown.
- •Verbal consent from the patient (e.g. they agree before you tap Check Vitals).
- •Patient camera on and face visible.
- •Stable network connection for the host and patient.
When you click Check Vitals, the app posts messages in Zoom meeting chat to the patient (all participants in the meeting can see meeting chat). Notifications are in chat, not separate push alerts.
Consent message (sent when Check Vitals starts)
“@{patient name}: By continuing, you consent to real-time camera processing to measure vital signs. Video is not stored—only processed to generate health insights which are saved in patient database systems. You may stop the measurement at any time by turning off your camera.”
Messages during the scan (examples)
At 10 seconds
“@{patient name}: Health check starting! 💙 50s left - Look at the camera and sit comfortably near a light source.”
At 20 seconds
“@{patient name}: No devices needed 📷 40s left - Stay still and look toward the screen.”
At 30 seconds
“@{patient name}: Your privacy matters | 🔒 30s left - Video is processed live and never recorded.”
At 40 seconds
“@{patient name}: What's happening? ✨ 20s left - Tiny skin color changes help measure heart rate & breathing.”
At 50 seconds
“@{patient name}: Just like an in-person visit 🩺 10s left - These vitals help your care team understand how you're doing.”
At 55 seconds
“@{patient name}: Almost done—great job! 🙌 - Just a few more seconds.”
At 60 seconds
“@{patient name}: Scan complete! 🎉 Your vitals are being prepared for review.”
Opt out: The patient may stop the measurement at any time by turning off their camera in Zoom, as stated in the consent message.
Wait about 60 seconds for the scan to finish. Live vitals may appear in the app during the scan; final results display when processing completes.
View and share results (optional)
Use case
Review heart rate and respiratory rate after the scan and optionally post a summary to meeting chat.
Prerequisites
- •Scan completed successfully.
- •You are still in the same meeting session.
After the scan, vitals appear in the VitalsCheck panel. You can use Share results to chat to send heart rate and respiratory rate to the patient in meeting chat.
Removing VitalsCheck
How to remove the app from your Zoom account and what happens to access and data.
Remove the app from Zoom
- Sign in to the Zoom web portal or open the Zoom desktop client.
- Go to Apps (or App Marketplace → Manage).
- Find Wise AI VitalCheck under your installed apps.
- Choose Remove or Uninstall and confirm.
What happens when you remove or de-authorize the app
- • VitalsCheck will no longer appear in your Zoom meetings until you add it again.
- • The app can no longer access meeting-related permissions you previously approved (for example, opening in meetings or RTMS-related capabilities).
- • New vital check scans cannot be started from the app after removal.
- • In-meeting chat messages already sent during past visits remain in that meeting's chat history per Zoom's normal behavior; Wise AI does not control deletion of Zoom chat history.
Data after removal
- Video: Not recorded or stored by VitalsCheck; it is processed in real time during a scan only.
- Vital sign results: May have been stored as part of your care workflow when scans were run (for example, insights associated with a session). Retention and deletion are described in our Privacy Policy.
- Data requests: To request access, correction, or deletion of personal data, contact contact@wiseai.care.
Troubleshooting (FAQ)
Common issues when adding or using VitalsCheck.
Need Help?
Our team is here to support you. Reach out if you have any questions or need assistance with the Zoom app.